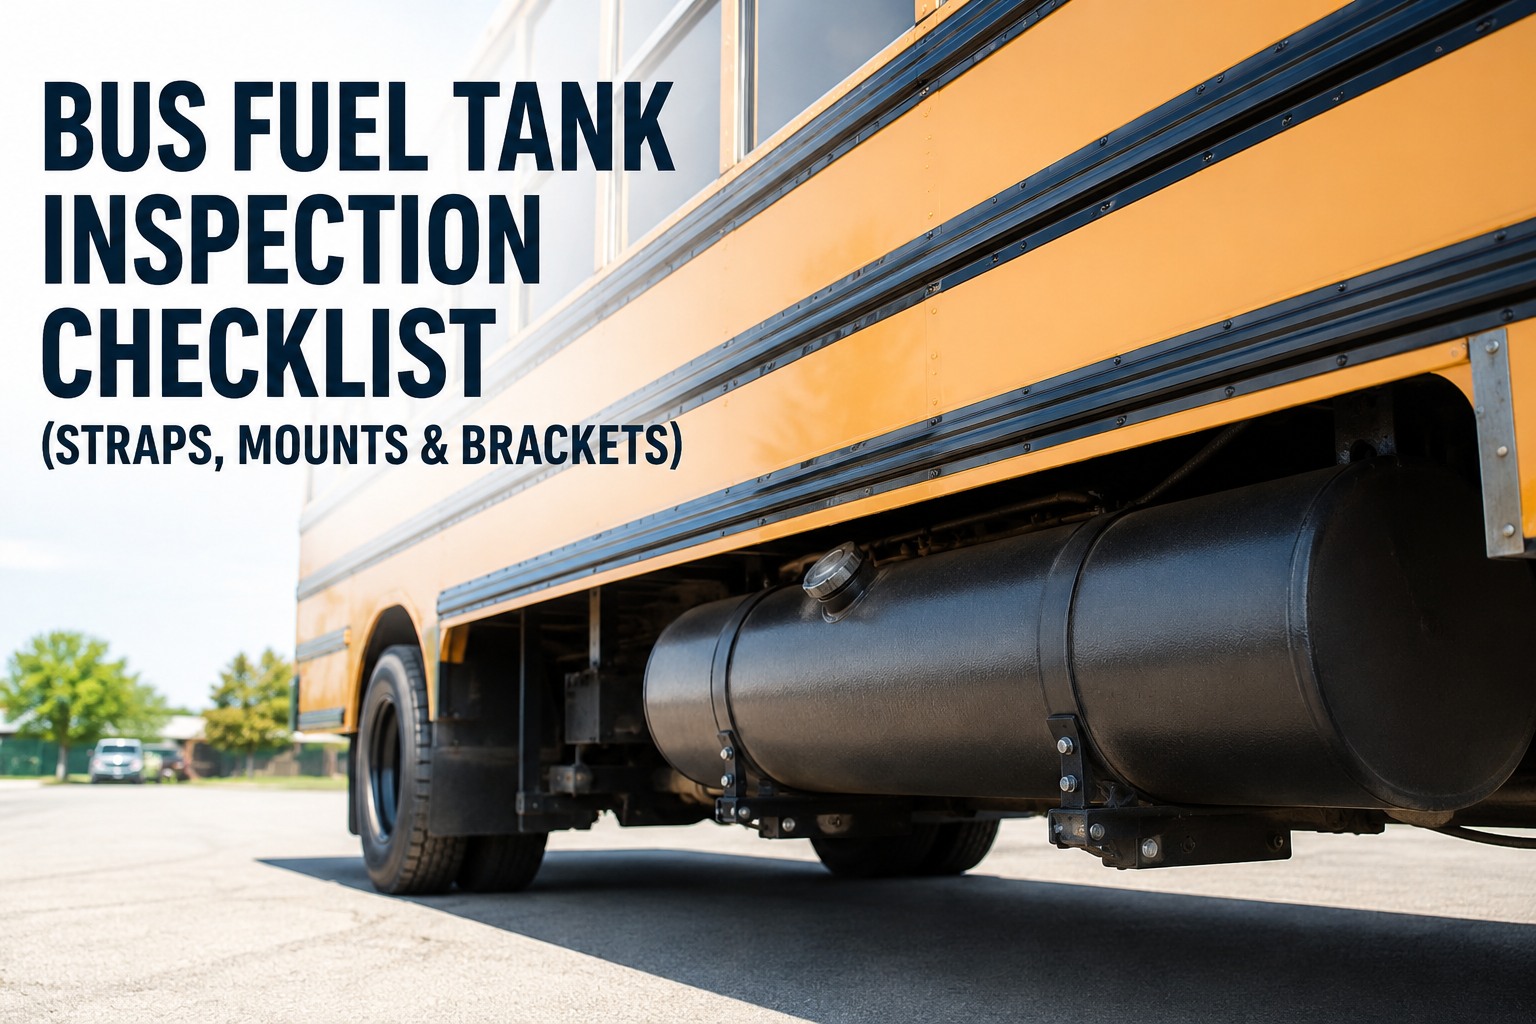
Ford Explorer. Chrysler Ram 1500 (2009-2018). Both had documented safety recalls where fuel tank straps corroded through, the tank contacted the ground, and fuel lines ripped free from the tank -- creating a fire hazard. On a bus, the passenger count multiplies the stakes by forty. Yet the fuel tank inspection often gets ten seconds during a pre-trip because "it looked fine last week." This is the underbody inspection reference that catches strap corrosion, cushion breakdown, weld cracks, and fuel line chafing before they become the incident report your fleet does not recover from.
Bus Fuel Tank & Mount Inspection: Zone-by-Zone Reference
The 2026 reference for inspecting fuel tank straps, saddles, cushions, brackets, welds, and fuel system components across diesel, CNG, propane, and gasoline buses. Covers FMCSA 393.65/67/68/69 requirements with real torque specs, leak-detection methods, and priority findings. Book a 20-min demo to see how BusCMMS runs underbody inspections at fleet scale.
Inspection Focus Changes by Fuel Type
Every fuel type has a different failure mode, a different regulatory citation, and a different inspection cadence. Read this before designing your program.
Book a demo to see fuel-type-aware PM schedules for mixed diesel + CNG + propane fleets.
The 7 Inspection Zones on a Typical Under-Chassis Fuel Tank
Side view of a typical mid-frame-mount fuel tank system. CNG installations differ (roof-mount) but share the same 7-zone reference.
- 1Tank Shell & Seams · main body, joints, welded seams, DOT stamp
- 2Mounting Straps · metal bands wrapping tank, torqued to chassis
- 3Saddle Cushions · EPDM rubber isolators between strap and tank
- 4Chassis Brackets & Welds · mount points on chassis rail
- 5Filler Neck & Cap · fuel intake, cap seal, vent function
- 6Fuel Lines & Fittings · feed and return lines to engine
- 7Skid Plate · underbody impact guard below tank
Critical Torque Specs for Fuel Tank Fasteners
Under-torqued straps loosen and cause tank movement. Over-torqued straps compress cushions and crack tank welds. Always verify OEM spec.
| Fastener | Torque | Notes |
|---|---|---|
| Strap-to-bracket bolt | 40-60 ft-lbs | Verify against OEM. Log actual value. |
| Bracket-to-chassis | 55-75 ft-lbs | Grade 8 hardware required. |
| Fuel line fitting (feed) | 15-25 ft-lbs | Use new O-ring on reassembly. |
| Drain plug | 25-35 ft-lbs | New sealing washer each service. |
| Fill cap | 1/2 turn past click | Verify vent + seal integrity. |
| Sender unit mount | 40-50 in-lbs | Note the unit change: inch-pounds. |
Book a demo to see torque values logged per-bolt per-bus over time in BusCMMS.
The 7 Inspection Zones in Detail
Each zone is a discrete inspection module with its own actions, criteria, and critical failure indicator. Work through them in numbered order.
Tank Shell & Seams
Under-body center · the largest surface area- Inspect entire shell for corrosion, rust bloom, or perforation
- Check all seam welds for hairline cracks (magnifying glass recommended)
- Look for bulging or deformation from over-fill or vapor pressure
- Aluminum tanks: check for white powder deposits (galvanic corrosion)
- Verify DOT certification stamp legible and current
Mounting Straps
Wrapping tank · the most common failure point- Inspect full length for corrosion, especially at the underside curve
- Look for stretched, deformed, or bent sections
- Check strap-to-bracket bolt for torque (40-60 ft-lbs typical)
- Verify no cracks near mounting holes (stress concentration point)
- Coastal fleets: check monthly for salt-induced pitting
Saddle Cushions / Isolators
Between strap and tank · the silent failure- Check EPDM rubber for cracking, flattening, or dry rot
- Verify cushion is centered under strap (not pushed to one side)
- Look for signs of tank-to-strap metal-on-metal contact
- Test for hardness -- healthy 60-durometer rubber has slight give
- Replace at any sign of chunking, brittleness, or missing sections
Chassis Brackets & Welds
Where straps attach to chassis rail- Inspect all welds around bracket base for hairline cracks
- Check for corrosion around the mounting boss
- Verify bracket-to-chassis bolt torque (55-75 ft-lbs typical)
- Look for deformation or bending from side-impact or road strikes
- Test thread engagement -- stripped anchor nut is a critical fail
Filler Neck & Cap
Where fuel enters · commonly overlooked- Inspect neck for cracks, especially at tank-to-neck weld
- Check cap seal for hardness, cracks, or missing material
- Test vent function (some caps are vented; some route to charcoal canister)
- Verify cap latches securely and requires normal force to open
- Look for fuel staining around neck base (indicates overfill or spillage)
Fuel Lines & Fittings
From tank to engine bay- Trace every fuel line end to end -- feed and return
- Check for chafing where lines cross the chassis rail or frame
- Verify all clips and standoffs are present and secure
- Inspect fittings for weeping fuel or dried fuel residue
- Torque line fittings to 15-25 ft-lbs (verify against OEM)
Skid Plate & Underbody Guard
Below the tank · impact protection- Inspect for deformation from road strikes or pothole impact
- Verify plate mounting bolts torqued and present
- Check drainage holes are not clogged with debris
- Look for corrosion, especially at mounting points
- Confirm plate maintains proper clearance below tank
4 Methods to Confirm Fuel System Leaks
A suspected leak needs verification before out-of-service. These are the four detection methods in order of precision.
-
M1
Visual Inspection
Wet spots, staining, dark residue on tank shell or around fittings. Use bright work light and clean rag. The first and most common method.
When to use: Every inspection cadence. -
M2
Olfactory Check
Fuel smell around the tank area, especially after the bus has sat overnight. Diesel is subtle; gasoline is obvious. CNG is odorized with mercaptan (rotten-egg smell).
When to use: If visual suggests a possible leak. -
M3
UV Dye Tracer
Add fluorescent tracer to fuel, run bus for 30 minutes, then inspect under UV light. Dye pinpoints the exact leak source. Works on all liquid fuels.
When to use: Persistent leak, unable to locate visually. -
M4
Electronic Detector
Hydrocarbon sniffer for liquid fuels; methane detector for CNG. Handheld device gives real-time reading. Most precise; required for CNG leak verification.
When to use: CNG systems; suspected vapor leak.
Book a demo to see leak-detection findings mapped to zone + auto work-order creation.
What Every Finding Means for the Bus's Next Move
A finding is not a fail unless the severity matches. This is the three-level priority reference.
Findings: Active fuel leak · tank contacting ground · strap corroded >25% cross-section · weld crack · missing skid plate · failed pressure vessel (CNG/LPG)
Action: Bus does not return to revenue service. Work order generated. Corrective repair required + re-inspection before release.
Findings: Loose fitting · cushion worn but present · minor bracket corrosion · cap seal aged · strap surface pitting · sender loose
Action: Tag out for repair at next scheduled PM (weekly or monthly). Bus continues in service. Log in bus asset history.
Findings: Surface rust bloom · minor cosmetic staining · heat discoloration on lines · skid plate scratched but functional
Action: Note in log. Trend against prior inspections. Re-inspect next cadence. No immediate action.
Book a demo to see priority-level triage and auto work-order routing per finding.
Paper Inspection vs BusCMMS Digital Inspection
The reference is the same. What changes is what happens after a finding.
Handwritten Checklist
- Discovery: Handwritten note on clipboard
- Photos: On the tech's personal phone, often lost
- Corrective action: Verbal handoff to shop lead
- Work order: Written up if remembered
- Torque history: None · each inspection is standalone
- Audit prep: Weekend project reconstructing binders
- Recall lookup: Manual per-bus search
Digital Template on Tablet
- Discovery: Failed checkpoint triggers alert
- Photos: Auto-attached to bus asset + zone
- Corrective action: Auto work-order with priority
- Work order: Routed to assigned tech + due date
- Torque history: Per-bolt trend line across cycles
- Audit prep: Instant DOT-format export
- Recall lookup: Bus asset tagged if VIN in recall
Book a demo to see the paper-to-digital transition live on your own fleet data.
The strap has surface corrosion but the metal underneath still looks solid. Serviceable?
Surface rust bloom without pitting or cross-section loss is Level 3 -- note and monitor. But the moment you see pitting deep enough to catch a fingernail, or any measurable reduction in the strap's cross-section, it moves to Level 1 immediate out-of-service. The Ford and Chrysler recall pattern was corrosion that looked cosmetic on the surface but had penetrated through the metal from the underside where road spray hit it. Always inspect straps from both sides. When in doubt, replace -- a strap is inexpensive compared to a tank drop.
How often should we do a torque check on strap bolts?
FMCSA does not mandate a re-torque interval. Industry practice is torque check at every annual inspection and after any incident that could have loaded the mounting (pothole strike, minor impact, off-road excursion). High-vibration operations -- rough roads, coastal fleets with body flex, older buses -- benefit from a quarterly torque check on random sample. Log the actual torque value each time. A slowly loosening bolt is a leading indicator of substrate fatigue or a stretched fastener, and catching it early prevents strap failure. BusCMMS trends per-bolt torque over inspections so the pattern shows up before the failure does.
Cushion is cracked but still in place. Replace now or wait for the next PM?
Depends on the crack. A superficial crack in the EPDM rubber that has not opened up is Level 2 -- fix at next monthly PM. But if the crack has opened into a gap wide enough that metal-to-metal contact is possible between the strap and tank, that is Level 1 immediate. The failure mode is tank wear against the strap edge which eventually perforates the tank. Cushions cost a few dollars per foot. Buses cost a few hundred thousand. Replace the moment the isolation function is compromised.
How do CNG cylinder inspections differ from liquid fuel tank inspections?
CNG has additional federally-mandated requirements under FMVSS 304 and 49 CFR 393.68. Cylinders have a manufacturer-specified service life (typically 15-20 years) and cannot be used past expiration regardless of visible condition. Detailed cylinder inspections are typically required every 3 years or after any incident (fire, impact, chemical exposure). The roof-mount saddle and strap system on transit buses is a different physical configuration from underbody diesel tanks, but the same seven-zone inspection framework applies -- tank/cylinder shell, straps, cushions, brackets, filler/PRV, lines, and impact guard. Add a methane detector for leak verification instead of visual dye tracer.
Where does this inspection actually live so it survives a DOT audit?
Paper folders and shared drives are where DOT audit findings come from -- the inspection got done, the record got lost. The audit-safe approach is a bus-specific CMMS that files each inspection against the bus asset, with per-zone photos, per-bolt torque values, corrective work orders, and closure evidence. When the state DOT inspector asks for the last four quarterly underbody inspections on bus #47, the record exports in seconds instead of being reconstructed from three binders. BusCMMS is purpose-built for this workflow with bus-specific asset profiles and integrated photo storage. Book a 20-minute demo to see audit-ready reporting live, or start a 30-day free trial and log your first inspection today.