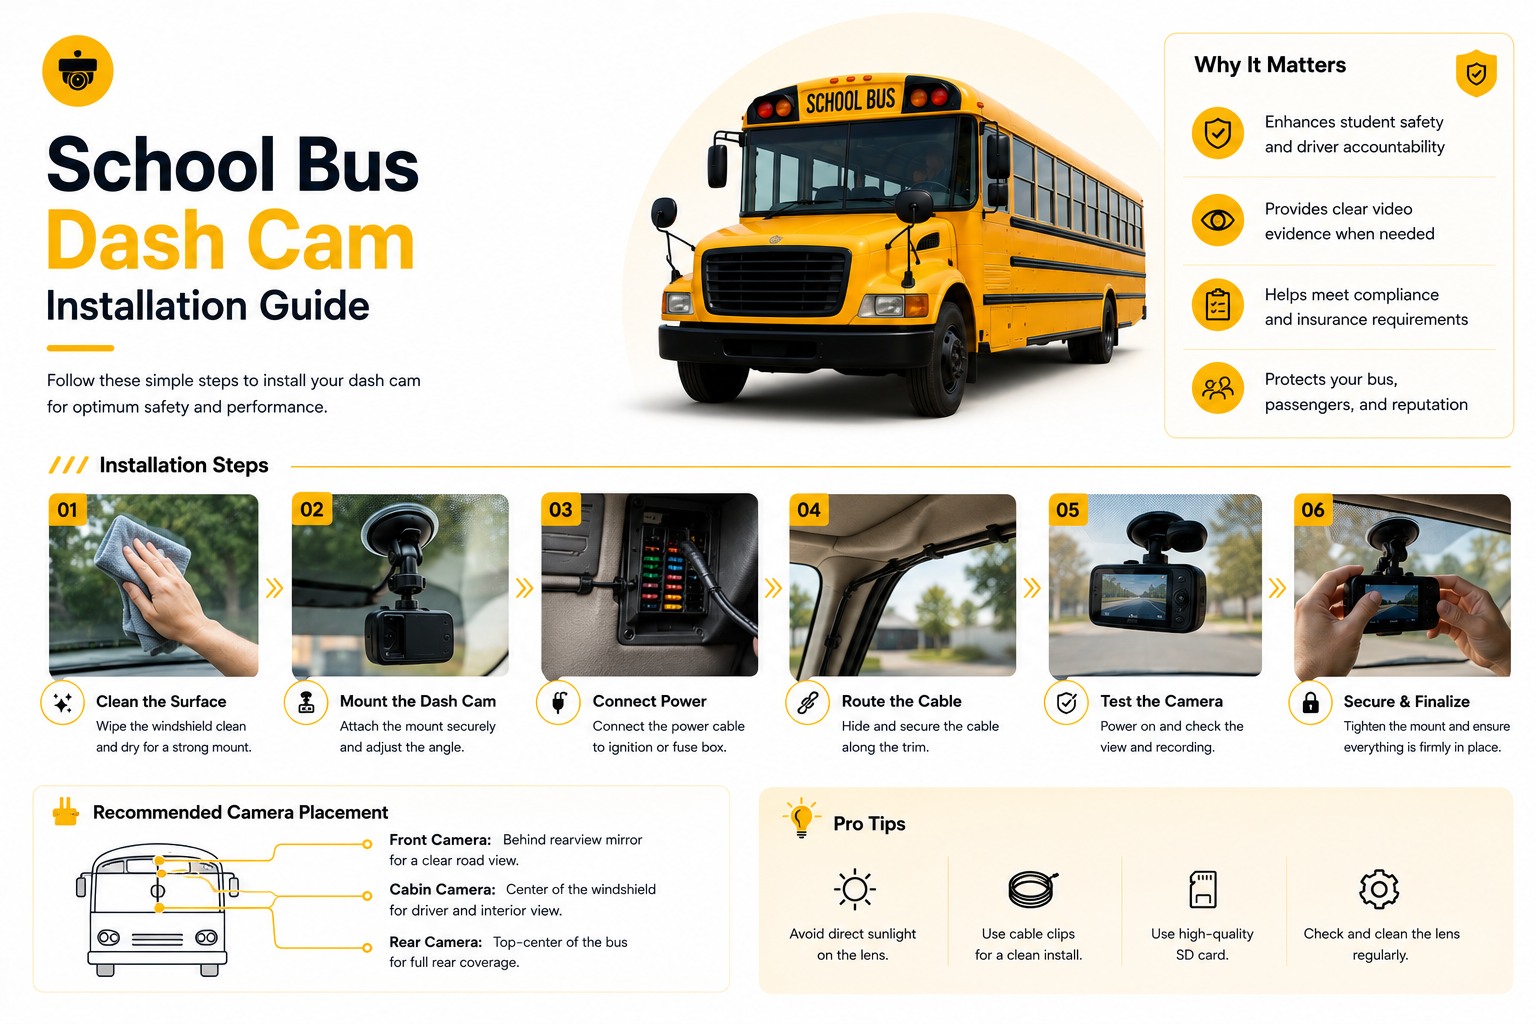
A dash cam installed without a defined sequence produces inconsistent results bus to bus — one tech routes the harness through a panel gap, another drills a new hole, and six months later no two buses in the fleet have the camera mounted or wired the same way. A school bus dash cam installation only becomes repeatable once it's broken into a fixed sequence every technician follows the same way, every time. See BusCMMS in Action → .
School Bus Dash Cam Installation Guide
The fixed install sequence that keeps every bus consistent, harness routing that survives a DOT inspection, and the commissioning tests that happen before a bus goes back on route.
- 1
Pre-install inspection
Confirm mounting surfaces, existing wiring routes, and windshield condition before any hardware touches the bus.
- 2
Windshield or bulkhead mount
Position set against verified field of view, not the easiest bracket location — see the coverage section below.
- 3
Harness routing
Cable run follows existing conduit and panel gaps wherever possible, secured to survive a DOT inspection.
- 4
Power connection
Tapped into a switched circuit appropriate for the unit, not a constant-power source that drains the battery.
- 5
Commissioning tests
A fixed checklist run before the bus is released — see the full list further down this page.
- 6
Sign-off and log entry
Install recorded against that specific bus's record, not a general fleet install log.
Harness Routing That Survives Inspection
Cable runs are one of the most common items flagged during a DOT inspection when done carelessly.
No single federal mandate governs dash cam installation specifications on school buses; the compliance bar here is 49 CFR 396 maintenance record requirements and district policy, which puts the responsibility for a clean, inspection-ready install entirely on the fleet's own standards. A harness routed loosely across a floor panel or draped near a moving component is exactly the kind of thing an inspector flags, and it's also the kind of thing that fails mechanically well before the camera itself does. The harness should follow existing conduit routes or factory wiring channels wherever they exist, be secured with proper fasteners at regular intervals rather than occasional zip ties, and stay clear of any panel that flexes or vibrates independently of the frame.
Windshield vs Bulkhead Mounting
Two different mounting surfaces, two different sets of constraints.
A windshield mount needs to sit inside the wiper sweep and avoid any inspection sticker or required signage placement, while giving the camera a clean, unobstructed forward view. A bulkhead mount — common for interior aisle or stairwell cameras — needs a surface stable enough that normal bus flex and vibration doesn't gradually shift the camera's aim over time, which is the exact failure mode covered on the tamper and obstruction detection page. Either mounting surface should be tested by hand before final fastening: a mount that flexes noticeably under firm hand pressure will likely drift within months of actual route vibration.
Commissioning Tests Before Release to Route
A camera that isn't tested before the bus leaves the shop is a camera you're trusting blindly on day one.
Recording confirmed on every channel, not just the primary one
Field of view visually verified against the intended coverage zone
Harness secured with no visible slack or exposed connection points
Power draw confirmed on the correct switched circuit, not constant-on
GPS and time sync confirmed against a known reference point
Install logged against the specific bus record before route release
Typical Labor Per Bus
Install time varies by camera count and bus complexity — worth budgeting realistically rather than guessing.
These figures assume a technician already familiar with the specific bus platform and camera hardware. First-time installs on an unfamiliar bus model or camera system commonly run 30-50% longer until the sequence becomes routine — a realistic detail worth including in any rollout schedule rather than assuming every install matches the fastest case.
The Spec Mistake That Undermines a Good Install
Even a perfect install can't fix a camera that was never suited to the job.
Here's the objection worth naming directly: purchases get specified around resolution as the headline number, while low-light performance, vibration rating, and retention window get treated as afterthoughts. A flawless installation on a camera with an inadequate vibration rating or insufficient retention window still fails the fleet eventually — the install sequence protects against workmanship problems, not hardware selection problems. Getting the install right and getting the spec right are two separate disciplines, and a rollout plan needs to account for both.
A Scenario From a Real Bus Operation
A fleet that standardized its install sequence after a rough first rollout.
A district running 55 buses began a dash cam rollout without a written install sequence, relying on three different technicians who each developed their own approach. Six months in, a fleet-wide review found meaningful inconsistency: some buses had cameras mounted well outside the wiper sweep, others had harnesses zip-tied loosely near floor panels that later needed rework during unrelated maintenance, and no two buses had commissioning documented the same way. The district's second rollout phase used a written six-step sequence with a mandatory commissioning checklist signed off per bus, and the resulting installs showed dramatically more consistency in both field-of-view accuracy and harness durability at the one-year mark.
Our first round of installs looked fine on the surface, but a year later we had three different mounting styles and at least two harnesses that had chafed against a panel edge nobody checked at install. Writing down the exact sequence and making commissioning a signed step, not just a mental checklist, fixed almost all of it. Consistency turned out to matter more than any individual technician's skill.
Not sure your current install sequence is consistent bus to bus? That's worth auditing before the next rollout phase. Talk to the team about an install audit →
Quick Spec Reference
Scannable on a phone during a vendor or technician call.
| Step | What to confirm |
|---|---|
| Mounting position | Field of view verified against intended coverage, not installer convenience |
| Harness routing | Follows existing conduit, secured at intervals, inspection-ready |
| Power source | Correct switched circuit, not constant-on drain |
| Commissioning | Full checklist run and signed off before route release |
| Labor estimate | 1-6 hrs depending on camera count; add 30-50% for first-time installs |
| Regulation status | No federal mandate; governed by 49 CFR 396 records and district policy |
Frequently Asked Questions
How long does it take to install a dash cam on a school bus?
A single forward-facing camera typically takes 1-1.5 hours for a technician already familiar with the platform. A dual-facing road-and-cab system takes 2-2.5 hours, and a full interior plus exterior system can take 4-6 hours. First-time installs on an unfamiliar bus model or camera system commonly run 30-50% longer until the sequence becomes routine.
Why does harness routing matter for a DOT inspection?
A harness routed loosely across a floor panel or near a moving component is commonly flagged during inspection and also fails mechanically faster than a properly secured run. Cable should follow existing conduit or factory wiring channels where possible, be secured with proper fasteners at regular intervals, and avoid any panel that flexes independently of the frame.
What should be checked before a bus is released to route after a camera install?
A commissioning checklist should confirm recording on every channel, verified field of view against the intended coverage zone, a securely fastened harness with no exposed connections, power draw on the correct switched circuit, GPS and time sync accuracy, and a completed log entry against that specific bus's record before it returns to service.
Is there a federal requirement for how school bus dash cams are installed?
No single federal mandate governs dash cam installation specifications on school buses. The compliance bar for bus records is set by 49 CFR 396 maintenance requirements and district policy, meaning install standards are set at the fleet level rather than dictated by a federal installation rule.
Why does a good camera spec still fail without a proper install?
Installation quality and hardware specification are two separate concerns. A camera with strong resolution, low-light performance, vibration rating, and retention capacity can still fail early if it's mounted carelessly, wired without proper securing, or never verified against its intended field of view. A rollout plan needs to account for both the right hardware and a consistent, repeatable install sequence.