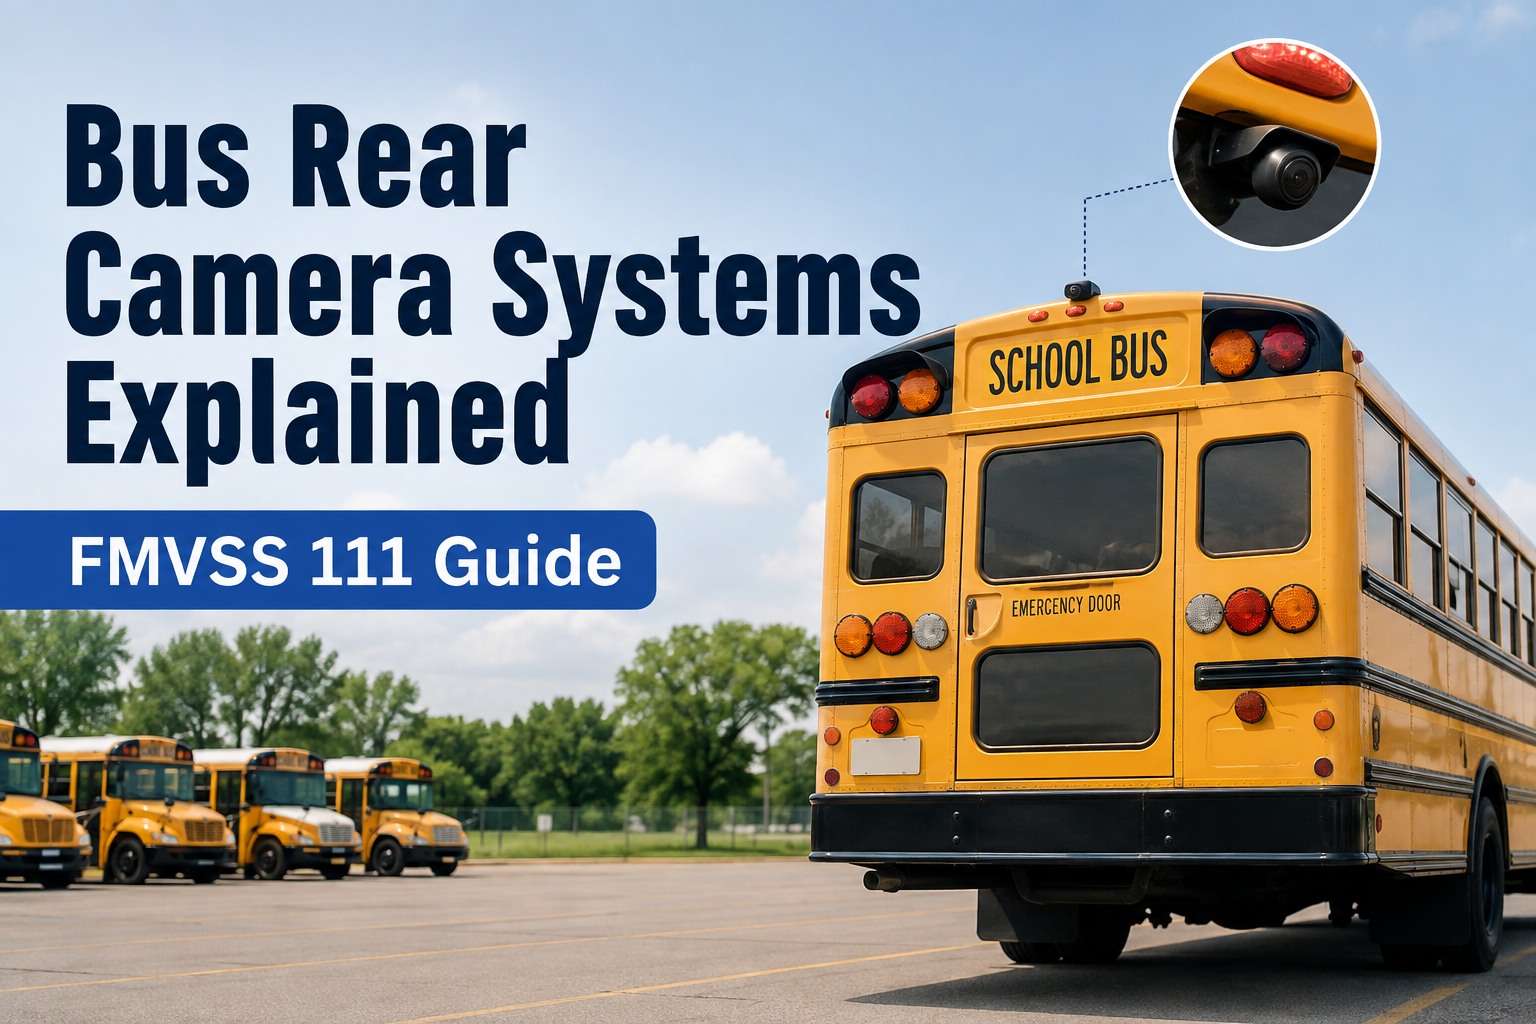
The blind zone behind a school bus stretches up to 40 feet — long enough to hide a full row of kindergarteners. A rear camera closes that gap. This guide covers how bus backup cameras work, what FMVSS 111 actually requires, camera placement decisions, and where fleet software fits when a camera defect surfaces. See BusCMMS turn rear-camera defects into closed work orders → book a 20-min demo.
The 40-Foot Blind Zone Problem
The area directly behind a school bus is the single largest visibility gap in the entire vehicle. Without a camera, the driver sees nothing from the rear bumper out to roughly 40 feet. This is what a rear camera actually solves.
How Bus Backup Cameras Actually Work
Three components. One reverse-gear trigger. The system stays dark until the driver puts the bus into reverse -- and then the driver's rear visibility goes from zero to full coverage in under a second.
A bus rear camera system is architecturally simple. A rear-mounted camera with a wide-angle lens sends video down a shielded cable to a dash-mounted or overhead monitor. The system typically activates automatically when the driver shifts into reverse, and many fleets configure the monitor to stay live at all times so the driver has continuous rear visibility during boarding at bus stops. Modern systems add DVR recording so backing events can be reviewed after the fact, night-vision infrared for early-morning and late-afternoon runs, and heated lens elements for winter fleets where snow and ice would otherwise obscure the view.
REAR CAMERA
Wide-angle lens (130-170° FOV) mounted on the rear panel, roof, or license plate housing. Weatherproof IP69K rating for wash-down and road spray. Modern units include infrared LEDs for low-light and heated glass for winter.
SHIELDED CABLE
Runs the length of the bus from rear to dash, protected against EMI, weather, and rodent damage. Cable quality is the single most common point of intermittent camera failure in older bus retrofits.
DRIVER MONITOR
Dash-mounted 7-10 inch screen or overhead-mounted display in the driver's natural sight line. Auto-activates on reverse gear engagement. Some fleets configure always-on display for continuous rear awareness at bus stops.
A camera without a working monitor is just a recording device. A monitor without a functioning camera is just a black screen. See BusCMMS track all 3 camera components per bus → book a demo.
FMVSS 111 Reality Check: What Actually Applies to Your Fleet
The most misunderstood regulation in bus fleet safety. Most school buses fall outside the federal mandate -- but that does not mean cameras are optional. Here is the decision framework.
FMVSS No. 111 Rear Visibility (49 CFR 571.111) is the federal standard that establishes rear visibility requirements for motor vehicles in the United States. The rule requires rear visibility systems (typically backup cameras) on vehicles with a gross vehicle weight rating (GVWR) of 10,000 pounds or less. Most Type A school buses fall at or under that threshold. Most Type B, C, and D school buses exceed 10,000 pounds GVWR and are therefore outside the FMVSS 111 mandate. That regulatory scope trips up transportation directors who read vendor marketing claiming FMVSS 111 requires cameras on their fleet, when it may not. The decision framework below walks through the applicability logic.
Is the bus GVWR 10,000 lb or less?
Typically Type A school buses and smaller passenger vans. FMVSS 111 rear visibility system requirement applies. Camera or equivalent system is mandatory.
Typically Type B, C, and D school buses over 10,000 lb GVWR. FMVSS 111 mandate does not apply. Go to Q2.
Does state law or district policy require rear cameras?
Several states have adopted rear-camera requirements for school buses regardless of GVWR. Check your state DOT and pupil transportation director for current statute.
No federal or state mandate. Camera adoption becomes a fleet safety best-practice decision based on backing incident history, insurance requirements, and safety program goals.
Is your fleet running an electronic DVIR program?
Camera-related defects fold into your existing 49 CFR 396.11 and 396.13 electronic inspection workflow. Each camera failure becomes a documented defect and work order.
Camera defects likely live in paper DVIRs or supervisor emails, creating the fragmented-record problem addressed in Section 4 below.
FMVSS 108 (lighting) is also often referenced in bus rear equipment conversations. It governs required lighting equipment such as brake lights and reverse lights, not cameras specifically, but should be reviewed together with FMVSS 111 in any rear-equipment retrofit planning. See BusCMMS log camera-related regulatory status per bus in your fleet → book a demo.
Camera Placement: The 4 Mount Options and Their Trade-offs
Where you mount the camera determines what it sees, how long it lasts, and how much cable you have to run through the bus. Four common mount positions each with their own compromise.
Camera placement is one of the most consequential decisions in a rear-camera program. A camera mounted 12 feet high on the roof sees a huge downward field of view but is harder to service and more exposed to weather. A bumper-mounted camera is easy to reach but the first thing to get destroyed by a shopping cart at a school parking lot. Rear-panel mounts sit in the sweet spot for most Type C and Type D buses but require careful cable routing through the body. The matrix below breaks down what most fleets weigh when choosing a mount position.
ROOF-MOUNTED
REAR PANEL / TAILGATE
LICENSE PLATE HOUSING
REAR BUMPER
Rear-panel mount wins for most school bus fleets because it balances field of view, weather protection, and service accessibility. Sign up free and log camera mount position + condition per bus →
The Camera Defect Workflow Gap
Where every rear-camera program actually breaks down. It is not the hardware. It is what happens the day after a driver notices the camera lens is fogged.
Every transportation director has lived some version of this: the district invests thousands of dollars per bus in modern rear-camera systems. Twelve months later, 8 buses have some form of camera issue. Some were noted on driver DVIRs. Some were mentioned to a shop foreman in passing. Some were emailed to the safety director and lost in the inbox. Then a backing incident happens and the incident review reveals the rear camera was flagged non-functional 6 weeks earlier. The camera hardware worked exactly as designed. The workflow around it did not. The comparison below shows the broken workflow every district recognizes on the left, and the closed-loop workflow that fixes it on the right.
What most fleets actually run
- 01Driver notices camera issue
Writes on paper DVIR: "rear cam blurry"
- 02Paper DVIR delivered to office
Filed in binder. May or may not reach shop.
- 03Camera issue forgotten
No work order. No shop schedule. Bus keeps running.
- 04Backing incident occurs
Investigation shows camera was flagged weeks earlier.
What BusCMMS enables
- 01Driver flags defect on tablet
Electronic DVIR: "rear cam blurry" · photo attached
- 02Work order auto-generated
Assigned to shop foreman. Bus flagged in system.
- 03Technician repairs and documents
Lens cleaned or replaced. Parts logged. Time logged.
- 04Bus cleared for service
Repair recorded to asset history. Full audit trail intact.
The difference is not the camera. The difference is what happens the day after the driver notices the problem. See BusCMMS run the closed-loop workflow on your fleet → book a demo.
Where BusCMMS Fits Rear-Camera Operations
The camera captures what happens behind the bus. BusCMMS manages what happens next. Six specific ways rear-camera events flow into fleet operations.
Camera as Inspection Item
Rear camera, monitor, and cable each become named inspection items on the electronic DVIR. Driver checks camera function pre-trip; defect creates an instant work order.
Camera Defect Tracking
Every camera-related defect (blurry lens, dark screen, wiring intermittent, monitor flicker) tracked chronologically per bus with time-to-repair metrics.
Auto-Generated Work Orders
Failed camera on DVIR auto-creates a shop work order. Parts pulled from inventory. Technician time logged. Nothing lost in supervisor inbox.
Camera Health PM Cycles
Lens cleaning, cable inspection, DVR firmware updates, and monitor calibration all become scheduled preventive maintenance tasks per bus with completion tracking.
Backing-Event Video Linkage
DVR clips from backing incidents link directly to the bus asset timeline, driver record, and incident report. All in one place for insurance and review.
Compliance-Ready Audit Trail
Every camera defect, work order, repair, and inspection sits on the bus asset timeline. FMVSS 111 and state audit inquiries answered with one report.
We installed rear cameras on 54 Type C buses in 2023 — solid hardware, name-brand vendor. First 12 months we thought the program was working great. Then a backing incident at an elementary school revealed the rear camera on that specific bus had been flagged non-functional on three separate paper DVIRs across 8 weeks. The camera itself was fine. Our workflow was broken. We rolled BusCMMS underneath the whole camera program six months later. Every camera issue now becomes a work order the same shift it is flagged. Twelve months in: 42 camera defects captured, 42 closed within an average of 31 hours. Zero backing incidents from a known camera fault. Same hardware. Different workflow.
Related reading: our stop-arm camera pillar covers the enforcement side, and our bus dash cam guide covers driver-facing and forward-facing systems.
Frequently Asked Questions
What is a rear camera on a bus?
A bus rear camera is a wide-angle video camera mounted on the back of a school bus, transit bus, or motorcoach that transmits real-time video to a dash-mounted or overhead monitor in the driver's line of sight. Modern systems typically use a 130-170 degree field of view lens to cover the blind zone directly behind the vehicle -- an area that can stretch up to 40 feet on a full-size school bus and is otherwise completely invisible to the driver through mirrors alone. The system consists of three main components: the rear camera itself (typically 1080p HD with IP69K weather rating and infrared night vision), a shielded cable running the length of the bus from rear to dash, and the driver monitor (usually a 7-10 inch LCD display). Most systems auto-activate when the driver shifts into reverse gear, and many fleets configure the monitor for always-on display so drivers have continuous rear awareness during boarding at bus stops.
Are backup cameras required on school buses?
Federal answer: it depends on the bus GVWR. FMVSS No. 111 Rear Visibility (49 CFR 571.111) is the NHTSA standard that requires rear visibility systems on vehicles with a gross vehicle weight rating of 10,000 pounds or less. Most Type A school buses fall at or under that threshold and are subject to the mandate. Most Type B, C, and D school buses exceed 10,000 pounds GVWR and are therefore outside the federal FMVSS 111 requirement. State answer: several states have adopted rear-camera requirements for school buses regardless of GVWR, so always verify current statute with your state DOT or state pupil transportation director. District-policy answer: many school districts adopt rear cameras as a safety best-practice even where federal and state mandates do not apply, because the 40-foot blind zone behind a full-size school bus creates real backing-incident risk that no federal exemption eliminates. Always cite the specific 49 CFR 571.111 text and your specific bus configuration rather than relying on vendor summaries claiming universal FMVSS 111 applicability.
What does FMVSS 111 require?
FMVSS No. 111 Rear Visibility (49 CFR 571.111) requires that vehicles under 10,000 pounds gross vehicle weight rating be equipped with a rear visibility system that meets specific performance requirements. Those performance requirements include the ability to display a specified area directly behind the vehicle to the driver within a defined response time after the driver shifts into reverse, minimum field-of-view coverage of the ground area behind the vehicle, and image size and quality standards ensuring the driver can actually identify pedestrians and objects in the display. In practice, the requirement is met by a rear-mounted camera transmitting to an in-cab monitor. FMVSS 111 was substantially strengthened by NHTSA in a rule that took full effect for vehicles manufactured on or after May 1, 2018. The rule's scope is limited to vehicles at or under 10,000 lb GVWR, which means most large school buses fall outside the federal mandate but many small Type A school buses fall within it. Always verify current applicability by reading the CFR directly rather than relying on secondary summaries.
Where should a bus rear camera be mounted?
Four common mount positions each carry trade-offs. Roof mount (10-12 ft above ground) delivers the widest field of view and easily covers the entire 40-foot blind zone, but exposes the camera to full weather including snow, ice, UV, and rain, and requires ladder or roof platform access for service -- best for transit and coach buses with clean roof lines. Rear-panel or tailgate mount (6-8 ft above ground) offers excellent field of view with a natural downward angle, moderate weather exposure with some shielding from body overhang, and step-stool service access -- this is the most common mount for Type C and Type D school buses. License plate housing mount (3-4 ft above ground) covers the near-zone (0-20 ft) well but limited on far-zone visibility, is highly exposed to road spray and salt, and offers very easy service access -- best for Type A and smaller buses with limited body real estate. Rear bumper mount (2-3 ft above ground) provides only close-in visibility, faces extreme physical damage exposure (shopping carts, parking bumps), and is rarely recommended for school bus use. Rear-panel mount wins for the majority of school bus fleets because it balances field of view, weather protection, and service accessibility.
How should a fleet manage rear-camera defects and repairs?
Through a closed-loop workflow that ties every camera defect to an electronic DVIR, work order, repair record, and asset history entry. The broken workflow that most fleets actually run looks like this: driver notes "rear cam blurry" on a paper DVIR, DVIR is filed in a binder, camera issue never reaches the shop, weeks pass, backing incident occurs, investigation reveals the camera was flagged non-functional weeks earlier. The closed-loop workflow that fixes it looks like this: driver flags the defect on a tablet-based electronic DVIR with a photo attached, BusCMMS auto-generates a work order and assigns it to a shop foreman, the technician repairs the camera (cleans lens, replaces cable, swaps monitor) and documents parts and time in the system, the bus is cleared for service with the repair recorded to the asset timeline. Every camera defect closes within 24-48 hours instead of weeks. Every repair creates a clean audit trail for insurance, state DOT inspection, and internal safety review. One 54-bus Southeast district Safety Director reported 42 camera defects captured and 42 closed with an average 31-hour close time, zero backing incidents from a known camera fault, using the exact same rear-camera hardware after adopting BusCMMS underneath the program.